

How to prepare a design for stitching
- Kelley Aldridge
- Sep 23, 2022
- 5 min read

(originally published 4th October 2015)
Have you ever wondered about the best way to get your design onto your fabric?
There are so many sources of designs these days, from online free websites to the new, trendy colouring books for grownups. If you’re lucky, you can even pick up a still-useable vintage pattern from a magazine or old craft book in a car boot sale. Wherever it has come from, the next challenge is to get it onto fabric so you can begin stitching it. If the fabric itself is thin enough, you can simply place it over the design and trace through. A light box often makes things easier to see, but a big-enough window on a bright day will do just as well!

Tape your design to the window first, then tape the fabric over top.
Masking tape is best, as it is easiest to peel off afterwards. A good
tip is to trace the design onto tracing paper, so that as much light as
possible will filter through and make the lines show up better through
the fabric.
But what if the fabric is too thick to see through, even with a light box or window? Or perhaps it has a strong weave, like rustic linen, which makes seeing the design difficult. Well, it depends on what type of embroidery you’re planning to do, and if it will be washable when complete. If so, then your best bet is to use water soluble fabric (brand names include Aquabond and Floriani). The thicker kind looks like a cross between tissue paper and really thin fabric - if you’ve ever used iron-on interfacing you’ll know what I mean! You trace the design on the fabric, with a gel pen (this is important, it can’t be an ink marker, because ink is wet and it will dissolve the fabric), then you tack this in place on the actual fabric of the piece, stitch everything, and when complete, dunk the whole thing in some hand-hot water. The water soluble fabric melts away, leaving you with an embroidered bit of fabric that just needs to be pinned out to it’s finished shape to dry. Works a treat!

Detail of stem-stitched alphabet on band sampler prior to dunking!

After dunking and blocking, no sign of the water soluble fabric!
Ah, but the piece you’re planning isn’t washable - it’s a bit of goldwork or stumpwork perhaps, and on thick-ish fabric… If the fabric is smooth, you have two options: using cotton organdie as ‘tracing paper’ or using the prick, pounce, paint method. If your fabric is textured, or has a nap, like velvet, then you’re looking at pricking, pouncing and painting (or drawing) on the design.
If you’re using the organdie option, it MUST be cotton, and unwashed. Trace your design carefully onto the organdie (which is see-through) with a fine waterproof market. Position and tack the organdie onto your fabric and proceed to embroidery through it and the main fabric. When the embroidery is finished, remove the organdie as you would waste canvas - one thread at a time. You’ll be amazed at how effective this is. Below are 3 images by kind permission of Kathy Andrews, who worked this beautiful mixed canvas stitched piece with me for her RSN Certificate.

Outline of shape to be stitched is traced onto a small square
of cotton organdie, and tacked into position over the
background fabric - in this case, embroidered canvas.

When the design has been embroidered, the tacking
stitches are removed and the warp and weft threads of
the organdie are removed in stages, using strong tweezers.

The finished piece - no sign of the organdie, and a
charming parasol to protect the walker from the snow.
If you’re only option is to prick, pounce, and paint onto the fabric, you’ll need some good-quality, heavy-duty tracing paper to draw your design onto. Once this is done, you prick holes along all the lines with a pin or fine needle, and position it on the main fabric. ‘Pounce’ (which is finely ground charcoal for black, or cuttlefish for white) is rubbed over all the holes so that some of the grains trickle through on the fabric beneath. This provides you with a dot-to-dot drawing which you have to connect with either paint on a VERY fine brush, or with a water-proof pen. ALWAYS test the paint/ink etc on a corner of the fabric you’re embroidering, to ensure it does not bleed in any way.

You can find design inspiration anywhere! The trendy new colouring books
for adults are full of lovely ideas. Just remember to use the designs for personal
enjoyment only - even better, trace off the basic outline, and make some
modifications of your own!

Using a fine pin,prick all the lines with holes - close enough to allow enough
ground charcoal (pounce) to trickle through in the next step, but not so close
that you perforate the paper and the design falls out! I use a computer
mousemat as my pricking pad, to cushion the design.

Hold your new pricking up to the light to make sure you've poked
enough holes everywhere!

Secure your fabric to a stable surface, then hold the pricking in position
on top of it. Do NOT pin or stick the pricking to the fabric, as this
will make it tricky to remove later, and may cause blurring. Load up a pounce
pad with a small amount of pounce, and gently rub over the pricing, so bits
of black powder trickle through the holes and onto the fabric beneath.

The pricking has been pounced, now it's time to see if it worked...

Not bad! I can see enough to play connect-the-dots! :)
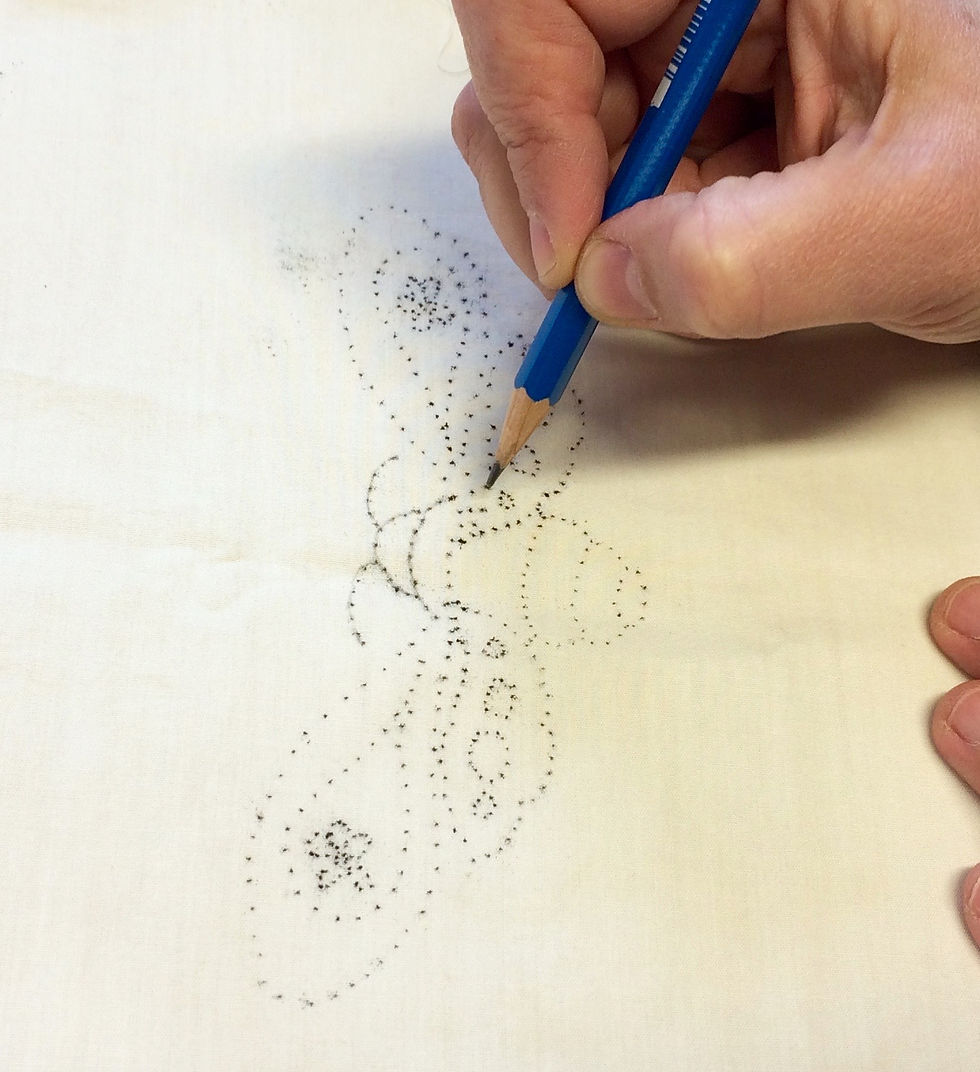
With an 'off-sharp' 2B pencil (meaning that it's sharpened to a
slim point and then worn down a bit to get that sharp bit of the end),
carefully draw a steady line over the dots - 2B is a soft-ish lead, so
you don't want to press too hard - it'll show up, trust me!

When you've done drawing, give the fabric a good hard shake, and the
pounce will fall off - you're left with a design transferred, ready to stitch.
(Apologies for the dodginess of this picture, I did the whole thing in a
hurry for this blog - normally it would be pristine!
So there you are! One way or another, you’ve got your design on your fabric, now off you go and stitch it! :)
A word on fabric pens and pencils: I’ve got several different types, and I adore both the water-soluble blue fabric markers (usually for quilting) and the disappearing purple fabric markers which I use when marking up the features on an art doll. What I would recommend is that you try them out on ‘scrap’ fabric, stitch them up a bit, and see if you’re happy with the result - your masterpiece heirloom christening wedding anniversary gift is NOT the place to experiment with new materials!
Do you have a favourite way of transferring designs for stitching?
Love ’n Stitches,
Kelley
p.s...if you liked this post, you might like this!
p.p.s... you can read more about Kathy's work on her blog, The Unbroken Thread, here.


留言